Sunday 14 February 2010

Valentine's Chocolate Mousse

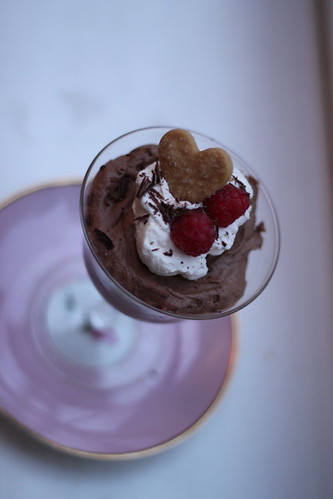
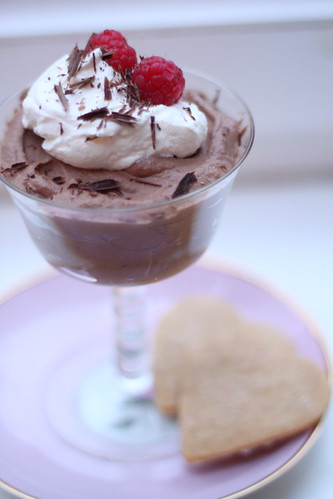
Mmmm, chocolate mousse... Rich, creamy and deeply chocolately - perfect for Valetine's Day dessert! How about topping with a cloud of whipped cream and raspberries?

chocolate mousse 2

With shortbread hearts of course...

chocolate mousse 3

Ooo, how about upping the cute factor with a mini heart? Perfect!

chocolate mousse 1

Or why not go the whole way to out and out indulgence and layer the mousse with flourless chocolate cake?

chocolate mousse 4

Utter decadence! Now if anyone can singlehandedly polish that off alone I'll be very impressed! Many thanks to Spike for such a perfect pick for today! For the recipe just hop on over here and don't forget to check out the other bakers.

Rosy xx

Friday 12 February 2010

Butternut Squash, Spinach and Goat's Cheese Risotto

So, hands up who's suffering from tooth ache after all the cake posts recently?? Yep, I still have a birthday cupcake post ready and waiting and of course there will be something sweet for my sweet this Valentine's day (obviously I demonstrate my love via the medium of food!). But today, I thought I'd go with something savory.
butternut squash risotto
I've been inspired by a new found friend to eat much more vegetarian food (seriously girl, publish that parmigiana recipe already, it's to die for! And I hate aubergines). I've also been attempting to eat much more seasonally and locally - a bit of a tough feat in London but thanks to these guys, a whole lot easier than it could be. If you do happen to live in their delivery zone which is, granted, fairly restricted, then please go and check out Farm Direct's website - I can vouch for how AMAZING the produce is and it even comes in rustic wooden crates! Makes me feel very trendy and en mode even though I'm far from either of those! The real bonus? They're super reasonably priced. Ok, so not on the same level as Tesco Value, but as they have no store front and only order what they need, so they can offer beautiful organic produce at frankly bargin prices.

Anyway, enough already with the Farm Direct fan club!! Back to the risotto. This was the product of much experimentation with the basic butternut squash risotto formula. I wanted it to be warm and comforting but not super stodgey - does anyone else get a little tired of heavy winter food?? But something about snow doesn't make you crave salads either. I wanted to keep the rich sweetness of the squash (or pumpkin - I bet that would work equally well) but inject some zestiness with tart lemons and contast with the bite of goats cheese. The spinach really adds to the colour and freshness of the dish, plus makes it feel super healthy!
butternut squash risotto 4
So it might seem that this is not the simplest risotto but it really is - just give it a go and you won't be disappointed. We probably have this for supper once a week and it's perfect for entertaining as well, especially if you have any vegetarians coming but don't want to faff around with seperate veggie/non-veggie dishes.

The only thing I would say is be careful with the seasoning - I've made this a touch too salty before by using too much stock powder as the squash is seasoned as well. I probably only use 1/2 tsp marigold bouillon powder dilluted in boiling water.

Butternut Squash, Spinach and Goat's Cheese Risotto

Serves: 3-4


1 tbsp olive oil
Knob butter
1 onion, finely chopped
1-2 cloves garlic (depending on size and how much you like garlic), crushed
½ butternut squash, peeled, deseeded and cubed
750ml hot vegetable stock (about 1/2tsp marigold swiss bouillon powder dissolved in boiling water)
White wine
375g risotto rice
A good handful (ca. ½ x 235g bag) baby spinach
Goat’s cheese, crumbled
Juice and zest of half a lemon
Another knob of butter
Parmesan
Seasoning (and some parsley and pine nuts if you have any lying around)

1. Place the cubed butternut squash in a roasting tin, drizzle with olive oil and season. Roast in a hot oven until nicely golden (ca. 30 mins at 200°C). This normally takes about as long as the rest of the risotto takes to prep and cook so do this first then worry about the risotto once it’s in the oven.

2. Heat the oil and a knob of butter in a deep pan, then add the onion and sauté for 4-5 minutes until slightly softened. Try not to let it brown. Add the garlic and cook for a moment more.

3. Stir in the rice and allow the oil to be absorbed and the grains to become glossy. Add the wine and allow the rice to absorb before adding a ladleful of stock at a time, continuing to simmer gently until the rice is tender* and the liquid is almost absorbed. Stir fairly constantly (but gently so as not to damage the rice) to avoid sticking.

4. Remove from the heat, season to taste then stir in the roasted squash, spinach, lemon zest and juice, herbs, a good grating of parmesan and a knob of butter. Cover and allow it to cook in the residual heat for a couple of minutes. Risotto improves massively by being allowed to rest for a few minutes!

5. Serve scattered with goat’s cheese and pine nuts with a bit more parmesan and pepper on top if you fancy.

*To test whether the rice is cooked, take a single grain between your fingertips and press together. If it is completely soft then it is cooked; if there is any hardness in the centre it requires further cooking.

Blue cheese, such as Gorgonzola, also works well with this recipe. I've even switched the spinach out for rocket before and it works wonderfully.

It’s worth letting the squash really get some colour going on in the oven as the super sweet flavour goes so well with the sharp goat’s cheese.

Rosy xx
Sunday 7 February 2010

Classic Red Velvet Cake

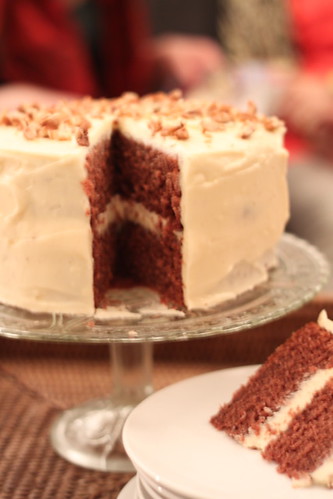
red velvet 1
Woo! Very exciting Sweet Melissa Sundays today as I got to choose the recipe! No small feat when faced with all the delicious possibilities within the Sweet Melissa Baking Book. The thing I love about the book is the number of American classics it provides great recipes for. Case in point, the butterscotch pudding last week. In the UK, you hear all about the muffins, brownies, Devil's food cakes and pecan pies eaten in vast quantities over the pond. So it's so much fun getting to recreate these sweet treats alongside bakers who're familiar with what the real deal tastes like.

One cake that particularly intrigued me during my time spent in the US (Nashville to be precise) was the Red Velvet cake. Why a cake would be dyed red is still somewhat of a mystery to me but boy, does it look stunning! But what is it supposed to taste like?? It has cocoa in but doesn't have a strong chocolate flavour. This particular recipe also has cinnamon in but I'm not sure that's a typical addition. So I'm hoping that my dear fellow bakers will be able to elighten me as to whether this is an authentic representation of a red velvet cake or not...
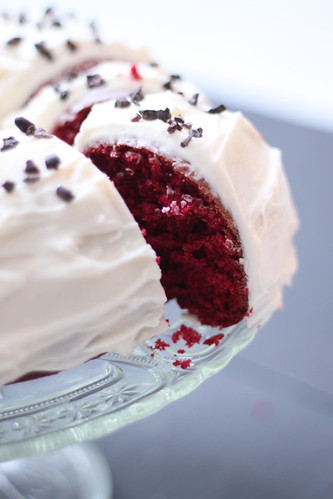
red velvet 2
But back to the recipe! So easy to put together and quick to make, this is definitely a winner. The texture was good - perfectly soft and moist - and it tasted great. But my cake didn't go red! It was kind of a brown colour... Now, I gather this is a common problem and theories abound as to why a red velvet cake might not turn red but I'm going to blame the food colouring. You see, in the interests of scientific research (and to get to eat more cake) I also made a comparison cake using the Hummingbird Bakery cookbook. For this cake, instead of boring old natural healthy food colouring, I used the red colouring derived from insects - cochineal. The good stuff. It does mean the recipe is no longer technically suitable for vegetarians, but wow was the cake red! As the actual recipe had very few differences (notably it used butter rather than oil) I think that the brand of food colouring used was what did it. So fellow UK bakers! Seek out the cochineal stuff and whack in a whole bottle to achieve the true red colour.
red velvet 5
As for the Hummingbird cake vs Sweet Melissas, I'm on the side of the Sweet Melissas cake. I did slightly prefer the texture of the Hummingbird one (a bit more fluffy and crumby is that makes any sense) but the taste of the Sweet Melissas one was far and away the best. I think it was the cinnamon. So I'm looking forward to reading with interest the other reviews of the cake - do check them out too! Meanwhile, I have 2 cakes to work my way through so if you'll excuse me...

Rosy xx

Red Velvet Cake
from Sweet Melissa Baking Book

For the Cake
3 3/4 cups all-purpose flour
3 tbsp best-quality unsweetened Dutch-process cocoa powder
2 tsp ground cinnamon
1 1/2 tsp baking soda
1 tsp salt
1 1/2 cups buttermilk
1 1/2 tsp vanilla extract
2 1/4 cups sugar
1 1/2 cups vegetable oil
3 large eggs
1 1/2 tsp red wine vinegar
2 tsp red food colouring

For the Classic Cream Cheese Filling and Frosting
12 ounces cream cheese, softened
3 cups icing (confectioner's) sugar
3 sticks unsalted butter, softened
2 tsp vanilla extract

Before you start
Position a rack in the center of your oven. Preheat the oven to 350F. Butter and flour two 9 x 2 inch round cake pans. Line each pan with a 9-inch round of parchment paper.

Cake
  1. In a medium bowl, whisk together the flour, cocoa, cinnamon, baking soda and salt.
  2. In a small bowl, whick together the buttermilk and vanilla.
  3. In the bowl of a mixer fitted with a whip attachment, cream the sugar and oil. Add the eggs and beat well. Add the vinegar and food colouring and mix to combine.
  4. Add the flour mixture to the batter in three batches, alternating with the buttermilk mixture. Mix well after each addition. Scrape down the sides of the bowl. Beat well for 10 more seconds.
  5. Divide the batter evenly between the prepared cake cake pans. Spin the pans to level the batter. Bake for 35-40 mins or until a wooden skewer inserted into the center comes out clean. Remove to a wire rack to cool for 20mins before turning out onto a wire rack to cool completely before icing.
Frosting*
  1. In the bowl of a mixer fitted with a paddle attachment, combine the cream cheese and icing sugar. Scrape down the sides of the bowl.
  2. Add the butter and vanilla and mix until just combined, about 45 secs. Do not overbeat and use immediately to fill and ice the top and sides of the cake.
Serve the cake at room temperature. It keeps well in a cake saver at room temperature for 2 days or in the refridgerator for up to 5 days. Alternatively, the baked uniced layers can be stored tightly wrapped at room temp for 3 days or in the fridge for 5 days or freezer for 2 weeks. Do not unwrap before thawing.

* I tried this method but I think my butter was soo cool so didn't work at all. But I found it worked well by beating together the butter and cream cheese then adding the icing sugar and beating that in.

Friday 5 February 2010

JJ's Birthday Cake - Part 1

Hands down the best thing about birthdays is cake. Especially as you get a little older – the presents become less inspiring (JJ’s present from me was a v-neck sweater) and you no longer have cool parties with jelly and pass the parcel. But the cake? That’s always there. And the reason he proposed? Because I make him awesome cakes!! In fact, this year he got two cakes (he did propose after all - and he's been very good). Well, a cake and cupcakes but I’ll post about the cupcakes another time. This post is dedicated to this beauty:
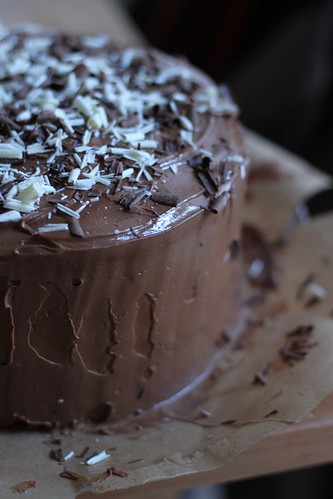
choc cake 1
If I could marry a cake then Jon might be out of luch... In fact, this was such a stunner that I’m just going to let the pictures do (most of) the talking.

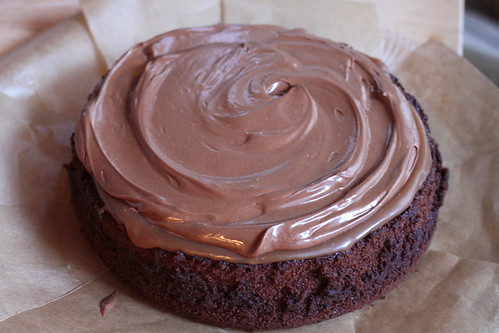
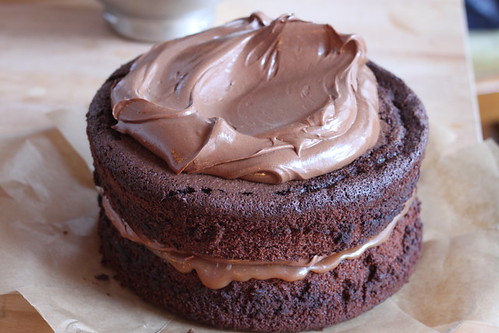
So you take a base of devil's food cake and slather on a layer of caramel, then a layer of whipped ganache...
choc cake 10
I had to stop myself from eating it just like this. And when I say eating it, I mean sticking my face in it.

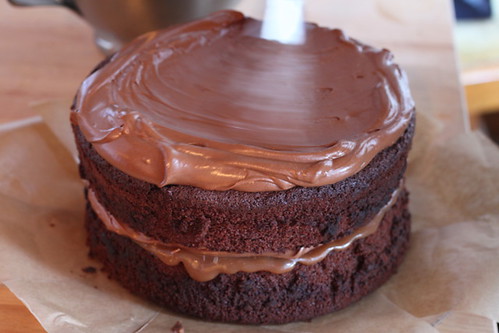
Then the second devil's food cake layer goes on with another blob of ganache:
choc cake 9
Oh wow. Can you see that little oozey bit of caramel?? MUST NOT LICK THE SIDE OF A HALF ICED CAKE! I did resist, I promise. Then, it's time to ice up the top...
choc cake 8
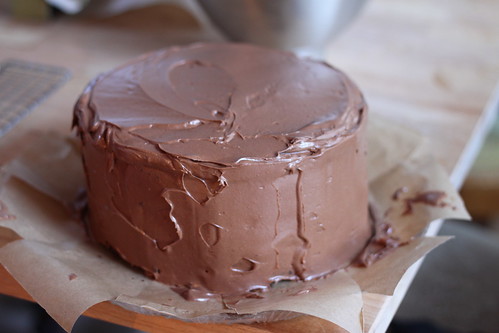
...and then the sides...
choc cake 7
You can spot that I have got little squares of parchment paper under the cake so the plate stays sparkley clean. Good when you make this much mess...
choc cake 6
But isn't she a stunner? I could have stopped here...
choc cake 5
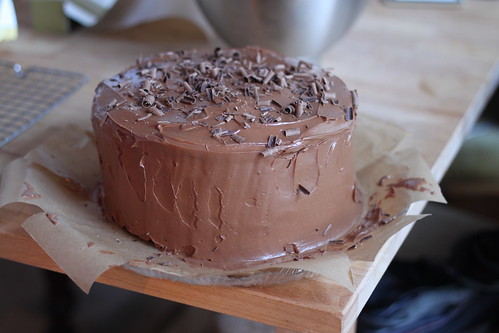
But there just didn't seem to be quite enough chocolate! So I got busy with a potato peeler and a bar of dark chocolate. Curls hide a multitude of terrible icing sins!
choc cake 4
Are you thinking what I'm thinking? Yep, still not quite enough chocolate...
choc cake 2
There we go! Much better. So take away the little bits of parchment et voila! The ULTIMATE chocolate cake. This was so incredibly rich even I could only manage 1 slice. And I can normally manage about 3 before passing out from hyperglycemic shock.
choc cake 1
But you know what was great about this cake?? It lasted for ages. Seriously, it was wonderfully moist and delish about 4 days later. I'd even go as far as to say I actually prefered it a couple of days old as the caramel had seeped into the bottom layer a bit and the flavours had really developed.

So in case you too would like to give your pancreas a work out, here's the recipe:

Devil's Food Cake
Adapted from The Sweet Melissa Baking Book

6 oz best-quality unsweetened chocolate, coarsely shopped
2/3 cup vegetable or canola oil
2 2/3 cup sugar (530g)
1 2/3 cup all-purpose flour (210g)
1/3 cup best-quality unsweetened cocoa powder
1 tsp baking soda
¾ tsp kosher salt
2/3 cup sour cream
3 large eggs
1 1/3 cups hot strong brewed coffee
 
Preheat your oven to 170C and grease and line 2 9” pans with parchment paper.
 
Melt the chocolate in a heatproof bowl over a pan of barely simmering water. When it’s completely melted, whisk in the vegetable oil until smooth. Remove from the heat but keep warm over the hot water.

Pop the sugar, flour, cocoa, bicarbonate of soda and salt in the bowl of a stand mixer. With the paddle attachment, give it a quick stir around.

In a separate bowl, whisk up the sour cream and eggs.

Add this to the flour mix and mix until just combined. Scrape down the sides, add the melted chocolate and mix again. Then add the hot coffee in a constant stream with the mixer on low and mix until combined.

The mixture’s super runny but don’t panic! Just pour into your tins and bake until a skewer comes out clean.

I found my cakes took about an hour (the recipe states 35-40 mins) but then I use a lower oven temperature when cooking layer cakes. I read somewhere that the way to get a flatter top on your layer cakes is to knock the temperature down a notch, so I baked these at 170 rather than 180. And lo! I didn’t have to cut the tops off to have a nice flat cake. But hey, it might be fine at 180, I just haven’t tried it! Leave to cool completely before icing.

Caramel Layer
Adapted from David Lebovitz (the king of caramel)

1 cup (250ml) heavy cream
1/2 cup (125ml) water
1 cup (200g) granulated sugar
1 tablespoon light corn syrup or glucose
1/8 teaspoon coarse salt

Warm the cream in a saucepan until it just starts to bubble. Set aside.

Gently heat the water, sugar, salt and glucose syrup in a heavy saucepan until the sugar dissolves. Then whack the heat up and cook until it's a caramel - David does such a great job of explaining how to master this that you should just go ahead and check out this post. Works like a dream and no candy thermometer involved! I always mess up caramel when I'm focusing on the thermometer and not on the caramel.

When it's a gorgeous dark caramel colour (like an old penny) remove from the heat immediately and CAREFULLY pour in the hot cream in a steady stream. It will bubble up and is SOOOOOOOOO hot so be super careful.

Transfer to a bowl to cool to room temperature and eat with a spoon, ahem, sorry, use to ice the cake.

Whipped Chocolate Caramel Ganache

Adapted from here

¼ cup water
200g sugar
Pinch coarse sea salt
2 tablespoons glucose syrup (25g)
1 1/2 cups heavy cream
1 pound dark chocolate, chopped
1 pound (4 sticks) butter, cut into tablespoon-sized pieces, softened but still cool

Pop the water, sugar, salt and corn syrup in a medium saucepan. Heat slowly until the sugar has dissolved and then bring to a boil over high heat. Cook until the mixture to a caramel, as for the caramel sauce above.

In another small saucepan add cream and bring to a boil. Remove from heat and set aside.

Add the hot cream to the caramel; stir to combine. Let cool 5 minutes.

Place chocolate in the bowl of an electric mixer and pour caramel sauce over chocolate. Let sit 1 minute before stirring from the center until chocolate is melted.

Attach bowl to electric mixer fitted with the paddle attachment and mix on low until the bowl feels cool to the touch.

Add butter a few chunks at a time and increase speed to medium-high until mixture is well combined, thickened, and slightly whipped, about 2 minutes.

Construction

Cut out lots of parchment squares and put them under the edge of your cake so that your cake plate stays clean while you slather icing everywhere. On the first layer, apply a good thick layer of caramel and top with a generous layer of ganache. Whack in the fridge while you have a cup of tea so that it sets nicely and can hold the top layer.

After about 15 mins in the fridge, take it out and carefully lay on the top layer of cake. Press down and swivel gently to make sure it’s stable. Then get icing! If you’re not in a freezing cold flat, you might want to pop the ganache and/or cake in the fridge for a bit just to make icing it a bit more manageable.

Finish off with whatever decoration floats your boat – I went with dark chocolate and white chocolate curls, which just involves taking a potato peeler to a bar of chocolate. Easy!

Lap up the praise from all your friends and enjoy!

Rosy xx

Monday 1 February 2010

Butterscotch Pudding

butterscotch 5
Oops, a touch late with this week's Sweet Melissa Sundays, but boy, are these worth the wait!! In the UK, we don't really have pudding and I honestly can't say it ever appealed. I think I imagined something like Angel Delight which, quite frankly, scarred me as a child. But these?? Well! Let's clear one thing up - they're nothing like Angel Delight (which, if you haven't tried it, isn't the least bit delightful).

These bear a much closer resemblance to crème brulees, both in texture and method. I called on JJ to help with these as he is the official crème brulee master in our house. He doesn’t tend to cook that much (mostly because I politely tell him to stop stirring the sauce and no, that lasagna does not need chilli added to it) but what he does cook, he thoroughly researches, tweaks and makes repeatedly until he perfects the recipe to his exacting standards. And crème brulees fall into that category (was that ever a bad month for the waist line!).
butterscotch 4
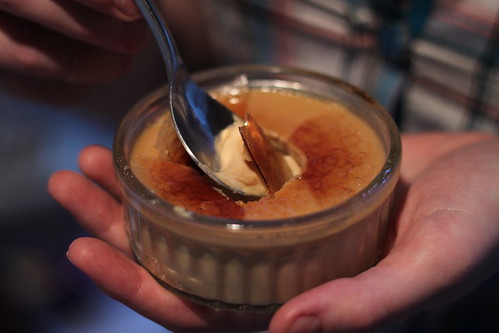
So when I presented him with a ramekin of pudding to try, he immediately asked whether he could get the blow torch out and brulee the tops. His method produces the most stunning glassy finish ever – caster sugar spread in a uniform layer on the surface then, with a small spray bottle, gently spritz the surface with water. This helps the sugar dissolve slightly and prevents clumping of the caramelizing sugar.
butterscotch 1
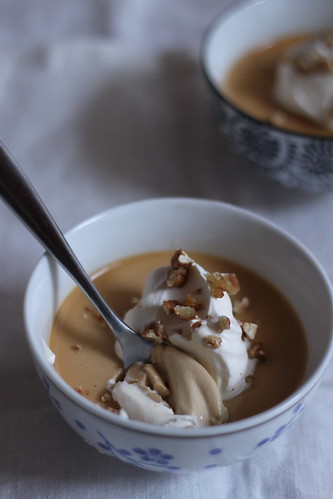
These puddings are stunning. Just stunning. I had to barricade the fridge to stop JJ eating the lot before I had a chance to photograph them. Now, I’ve never had another pudding to compare these to, but I doubt anything could come as close to sweet, creamy, dreamy heaven as these do! The brulee top was gorgeous but they were equally delicious with a cloud of cream and a sprinkling of nuts.
butterscotch 2
So thank you so much to Jen of Maple n’ Cornbread for introducing me to the world of puddings – I’m not sure I can wait until someone picks the chocolate version in the cookbook to make it!! Don’t forget to check out the other bakers’ blogs and if you would like the recipe (and TRUST ME, you want this recipe) you can find it here*!

Rosy xx

*lots of other bakers reported that the 1tsp salt called for made the puddings far too salty. I didn’t find this, but then I’m always cautious when using American recipes as they so often use kosher salt which has larger grains than regular table salt. So a word of warning! When making this, maybe just use 1/2tsp rather than the full amount.